How to Grow From Seed - Detailed Guide

by Heather McCargo

Read on for an in-depth look on why and how to grow native plants from seed. For just the essentials to start growing today, check out our Autumn & Winter Seed Sowing in 6 Easy Steps.

How to Germinate Native Seeds

Propagating native plants doesn’t require expensive or sophisticated facilities. Native seeds are ideally suited to germinate outdoors in beds or pots. For many native plants, outdoor seed sowing is often better than a greenhouse where the temperature is too consistent and high humidity creates perfect conditions for rot. With outdoor propagation, seeds germinate when the conditions are optimum for each species. For some, that’s in the frosty temperatures of early spring and others in the heat of summer.

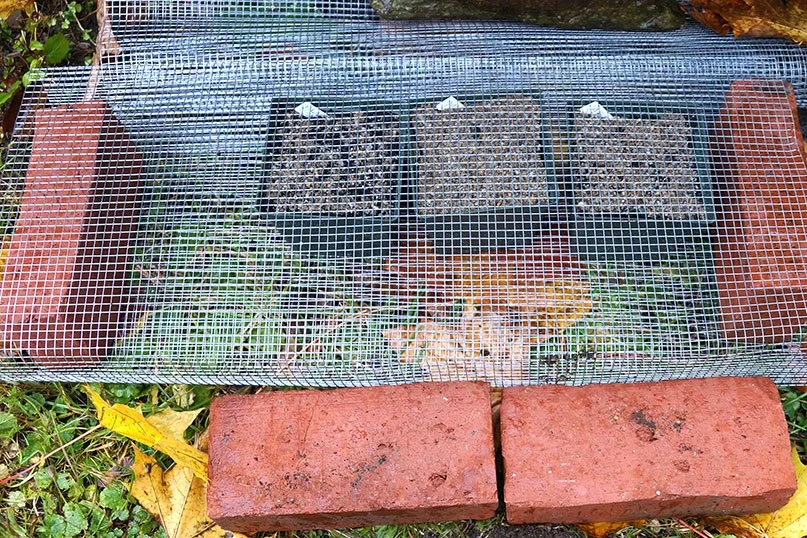
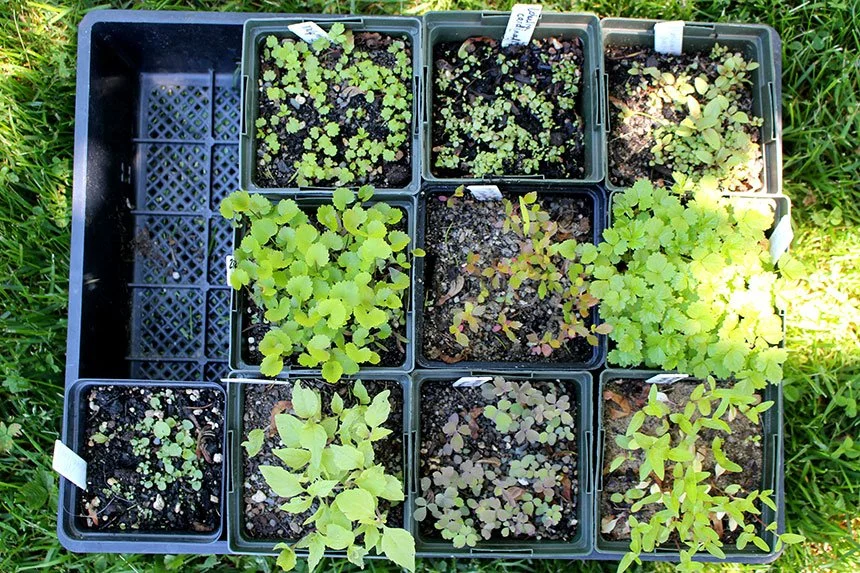
Seeds can be sown in seed flats or plastic pots 4’’- 10” in diameter and 3” or more deep and tucked into a shady, protected spot where they’re still exposed to rain and snow. Uncovered cold frames, similar to what we use at our Native Seed Center, makes a good nursery area for seed flats and pots. Protect pots with wire mesh or hardware cloth to prevent predation by rodents and birds.

Sowing the Seeds

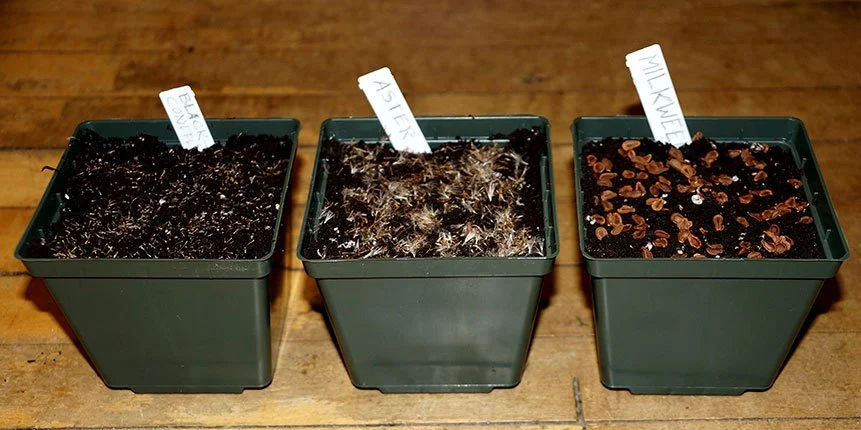
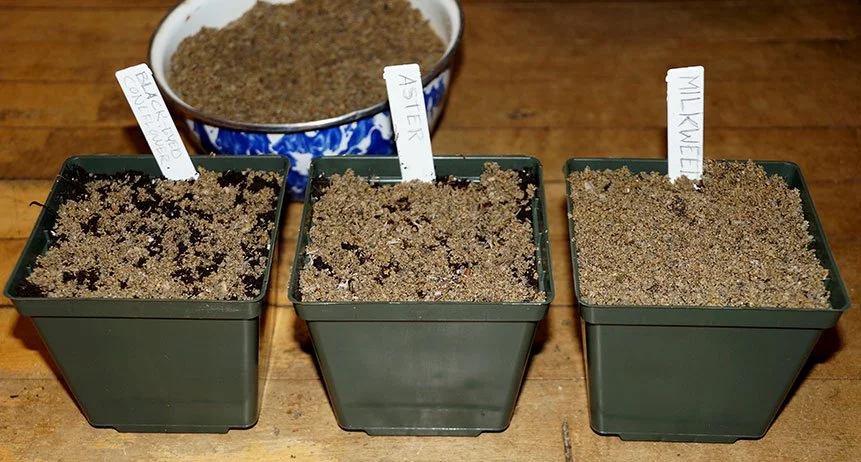
Label each pot with the species and sowing date. Native seeds can be sown thickly (planted close together): sow seeds to the depth of the thickness of the seed and roughly 1/8 to ¼ inch apart. Seeds that are fine and dust-like are barely covered by soil (if at all, see germination codes below). After sowing, sprinkle pots with coarse sand, which is preferable to potting soil as the sand helps keep the seeds from splashing out in the rain. If nearby weeds are a concern, cover flats with a spun poly covering such as Reemay. Keep watered, usually every couple of days to a week. Pay extra attention to pots and soil moisture during periods of drought. Leaving seeds outdoors through the fall, winter, and early spring, where they are exposed to freezing and fluctuating temperatures, bypasses the need for artificial indoor stratification (refrigerator). This is the simplest method.

Waiting for Germination

Unlike cultivated plants like vegetables and annual flowers, which have been bred for rapid germination, each native seed has its own timetable. In wild plants, seed germination is often variable. Some seeds will germinate immediately while others germinate irregularly over a period of weeks, months or even years. This reproductive strategy is advantageous for a wild plant because offspring are dispersed over time, a better strategy for dealing with the climatic fluctuations.

These germination codes organize species by their germination needs, and correspond to the labels on Wild Seed Project seed packets.

Germination Code A – Seeds can be sown outdoors in fall or early spring.

Species include: aster, columbine, milkweed, lobelia, coneflower, campanula, wild strawberry, jack-in-the-pulpit, wintergreen, fern spores, spirea, sweet-pepperbush, buttonbush, bush-honeysuckle, rhododendron, St. Johnswort

Germination Code B – Seeds need a winter or cold period to germinate. Sow outdoors in fall or winter.

Species include: iris, vervain, blue-eyed grass, alliums, boneset, geranium, Joe-Pye weed, bunchberry, beardtongue, blazing star, violet, aronia, spicebush, bayberry, rose, wild plum, shrub dogwoods, serviceberry, elderberry

Germination Code C – Seeds need light to germinate; sow on soil surface and leave uncovered.

All tiny, dust-like seeds

Germination Code D – Seeds need alternating cycles of warm-to-cold-to-warm to germinate. They can be sown either outdoors in spring or summer and will germinate the following year, or in a flat in a warm place for three months, then moved to a refrigerator for two months, then moved outside in the early summer warmth.

Species include: Canada, turk’s cap, and wood lilies; black bugbane (aka black cohosh), viburnum

Germination Code E – Seeds cannot be allowed to dry out. Sow immediately.

Species include: pussy willow, bloodroot, marsh-marigold, trillium, wild ginger, bellwort, blue-bead lily; nuts: oak, hickory, butternut, hazelnut, and walnut

Germination Code F – Seeds take two years to germinate. Sow outside in the fall or winter and look for germination in the second spring. A shady location prevents the flats from rapid drying and reduces weeding.

Species include: Trillium, wild ginger, solomon’s-seal, bellwort, blue-bead lily, Canada-mayflower, false solomon’s-seal, viburnum, witch-hazel, basswood

Germination Code G – Large seeds should be soaked overnight in water.

Seeds over 1/4” in diameter (Iris, witch hazel, oak, acorn, hickory, cherry)

How long does it take? Seeds that need no pretreatment will germinate anytime from a week to several months after sowing. Species that need a winter stratification will germinate after spending their required time in the wet and cold; the length of time varies by species. Flats that fail to germinate initially will often germinate the following year. Don’t throw them out, be patient.

Artificial Indoor Stratification
If you find yourself with seeds that need a cold period and it’s late spring, you can still sow the seeds by giving them an artificial winter. Wrap the flat in plastic or sow the seeds in moistened sand or vermiculite and seal in a zip lock bag, record the date, and put in the refrigerator for 60 days. Remove after the simulated winter and put flat outside.

Transplanting Seedlings into Larger Pots or the Ground

Many native seedlings can stay in the original flat for the first growing season. If the seedlings seem overly crowded, they can be gently divided and potted the first summer. Otherwise, wait until the following spring to transplant seedlings to their new home. Keep the plants labeled. When transplanting, clump 3-10 seedlings together per pot (except for tree species). Organize plants according to their light needs, and water according to species requirements. Pay extra attention to potted seedlings during hot, dry, drought-like conditions. Pots dry out much quicker than the ground. A diluted liquid seaweed fertilizer every other week will keep seedlings healthy and strong. 

Overwintering Seedlings and Protecting Nursery Area from Rodents

Germinated pots and flats need winter protection from weather extremes and windburn, just as a consistent snow cover supplies to a garden. Multiple layers of a winter-grade Reemay covered with white plastic works well. The plants should be frozen before covering, otherwise rodents may choose your covered nursery as a perfect nest site.

Making a Seed Germination Bed

A germination bed has the advantage of needing less watering than flats or pots, and the seedlings can grow to a bigger size before transplanting.

Chose a location in full to part shade for woodland species, part shade for most other species, with the exception of full sun for plants that need dry, sunny conditions.

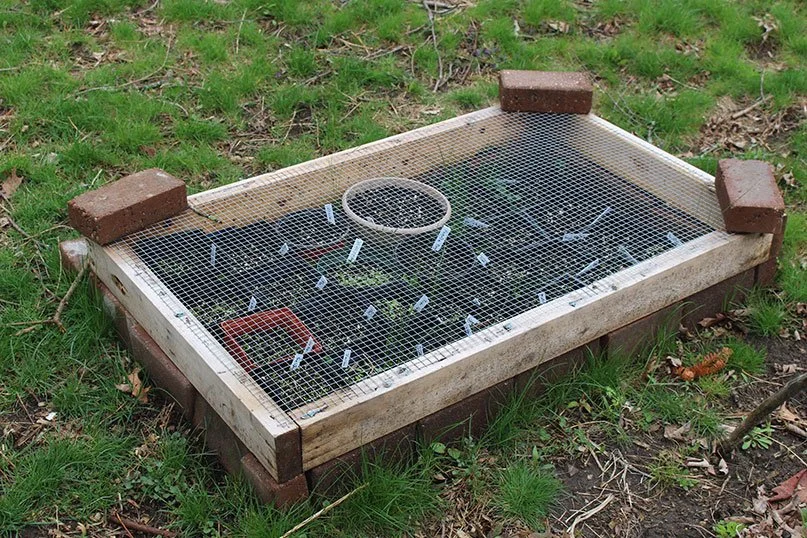
Make a frame out of rough-cut 2” x 10” or 2” x 12” lumber. Avoid pressure-treated wood, as it leaches harmful chemicals into the soil. A 4’x10’ bed will hold a lot of seedlings for several years. Staple some heavy-gage screening to the bottom, flip over, and set in place. Fill bed with a compost-based potting mix. You can create your own growing medium by mixing 3 parts compost or leaf mold, 1 part vermiculite, and 1 part coarse builders’ sand. The compost and leaf mold will contain lots of beneficial microorganisms and slowly release nutrients over time, unlike a peat moss based potting soil that is sterile and deprived of nutrients.

Seeds can be sown in rows across the bed and marked with long-lasting plastic label. If there is a nearby source of weeds such as an old field or dandelion strewn lawn, cover bed with Reemay.

Why wild-type seeds

At Wild Seed Project, we advocate for the propagation of wild-type native plants. Today, many commercial nurseries favor cultivars and hybrids, garden varieties that have been domesticated and bred to have characteristics such as dwarfism, specific flower color, double flowers and uniformity of growth. These traits may look nice to people, but they often lack reproductive ability or the genetic diversity that is necessary to adapt to changing environmental conditions. To perpetuate these traits, nurseries must reproduce these plants by cloning, that is without sexual reproduction.

In the wild, most plants reproduce sexually, in other words, from seed. Sexual reproduction results in variation between individual plants, as any single plant adapts differently in its ability to cope with environmental stress such as heat, drought, flooding and other disturbances. Genetic variation is a species’ best strategy for adapting to future environmental conditions, and seed propagation maintains the genetic diversity inherent in wild native plants.

Growing Ferns From Spores

Ferns are ancient plants whose ancestors first appeared on Earth over 300 million years ago. They are members of a group of primitive plants called Pteridophytes, which dominated the land before the rise of flowering plants. During the age of the dinosaurs, ferns and other primitive plants such as club mosses and horsetails reached magnificent proportions, many over 100 feet tall. This period of the Earth’s history had a global climate of warm temperatures and high humidity, ideal conditions for Pteridophytes to flourish.

Ferns have a unique reproductive strategy involving two distinct phases in their life cycle: the mature fern and the prothallia. Sometime during the growing season, a mature fern releases spores, which are the plants sexually reproductive cells. With adequate moisture and light, these spores begin to grow and form small flat plants called prothallia, the second phase in the lifecycle. Reproductive organs develop on the prothallia. If fertilization occurs, the egg cell grows into a sporophyte (young fern), and the lifecycle of a new fern begins again.

Fern spores can be propagated indoors in a bright windowsill out of direct sunlight or under a light. You will need some sterile, peat-based potting soil that has been moistened with boiling water and cooled off, water in a misting bottle (that has also been boiled and cooled), and a new clear plastic deli container.  Spores are sown inside the container, and if not sterilized, mold or algae can take over. In nature, ferns often germinate in moss, a rotting log, or damp exposed soil in shady locations such as by a stream.

Fill the clear plastic container ½ full with moistened potting soil and quickly replace the lid. With fern spores at the ready, open the lid and carefully sprinkle a light dusting of spores over the soil surface, much as you would season food by hand with a pinch of salt. Lightly mist, and put container in a warm, bright location without direct sunlight or under lights. Check for germination over the next couple of weeks or longer. Do not open the container unless you think the soil is dry, in which case you should water lightly with the mister.

At first, germination will look like a green coating on the soil surface. Next small flat green prothallia will appear; this is when sexual reproduction occurs. After a month or more, you will see little fern fronds. This means that you have successfully passed from the reproductive phase to a juvenile fern. At this point you should remove the lid.  Keep plants regularly watered but do not overwater or the plants could rot. Fertilizing with a very weak seaweed fertilizer will eventually be necessary. Small ferns—one inch tall—can be repotted in a good organic compost-based potting soil.  In early summer, move the pots outdoors into the shade to adjust to the natural growing season. They can be planted in the garden in late summer or early fall.

For more detailed information on growing ferns, consult Native Ferns, Moss and Grasses by William Cullina.

Previous
Previous

How to Make a Meadow

Next
Next

How to be an Ecological Gardener